
Still, don’t have a lightbox with a message? If so, we propose this step-by-step tutorial to make your own personalized lightbox. You will see that it is much simpler than it seems.
Lightboxes with messages not only provide a dim light spot to any room, but they are inspiring. Don’t hesitate to place one of these boxes on your desk, you will see how you charge with positive energy.
Materials:
-
- Wooden box.
- Drill and crown.
- Lampholder, bulb, cable, switch, and plug.
- Thick cardboard for the template, rice paper for the screen and a cutter.
- Pintyplus EVOLUTION acrylic spray paint black for the sign and the exterior of the box.
- Two plastic corners.
- Permanent Adhesive spray Pintyplus or hot melt adhesive.
- Repositionable adhesive spray Pintyplus for the template.
Step by step to create a DIY lightbox:
The main advantage of making your own lightbox is that you can customize it with your favorite colors. You can also create a set with the rest of the decorative elements of the room in which you are going to have it.
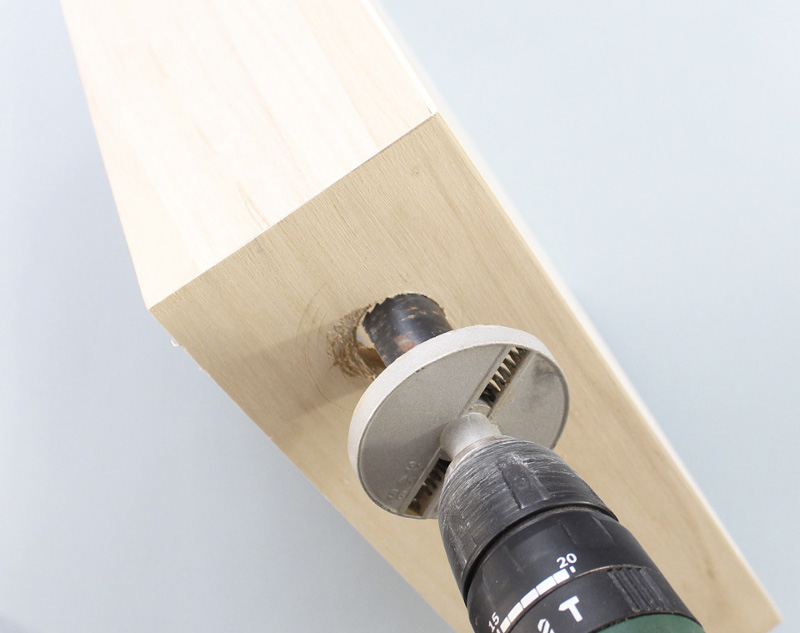
Step 1: drill the box the lamp holder:
First, one of the sides of the box will be punched with the crown. The hole must be large enough to fit the bulb holder and pass the cable with the plug.
Step 2: place the lamp holder:
Next, we put the bulb holder in the hole and screw the bulb on the opposite side. A trick if you want a firm fixation of the lamp holder, consists of placing a bit of adhesive in the box, we put the bulb holder in the hole and screw the bulb on the opposite side.

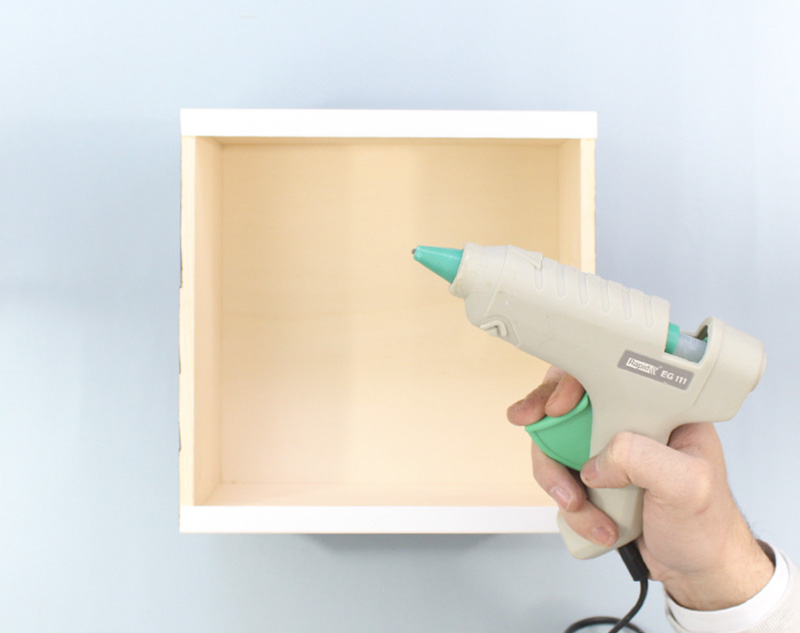
Step 3: Adhere to the corners:
Next, we will glue the two corners on the edges adjacent to the open face of the box, one of the top and one on the bottom. These corners will make guides to hold and slide the front label.
To adhere them you can use both hot melt adhesive and our permanent adhesive Greenox spray if you do not have a glue gun.
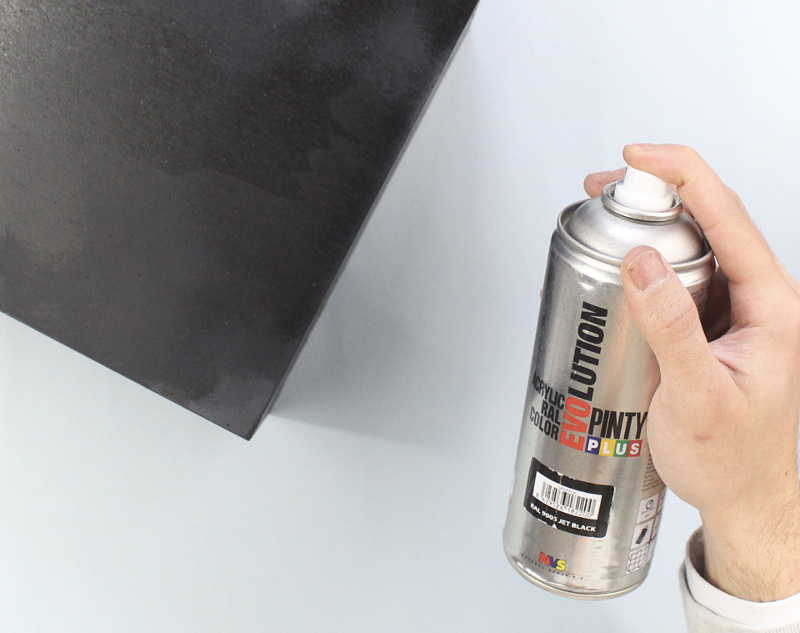
Step 4: Paint the box:
After performing the steps above, it was time to paint the box. For this, Pintyplus Evolution matt black has been used. The inner part will be protected, which will be left unpainted so that it does not lose luminosity.
If the wood was darker, the interior could be painted white to give it greater reflection power.
Step 5: Make the template:
Once we have perforated and decorated the luminous box, we will make the template to decorate it with the word we want.
To do this, we take a sheet of paper a little thick and draw the sign for our message. There are plenty of free designs to download from the internet and print them, although it is always more original to do it yourself. In this project, the word ‘hello’ was chosen, which he drew using the lettering technique.
Next, we cut out the letters carefully. It is about eliminating the written part of the paper without breaking the exterior, which is what we are interested in as a template. It is advisable in these cases to use a cutter or stiletto.

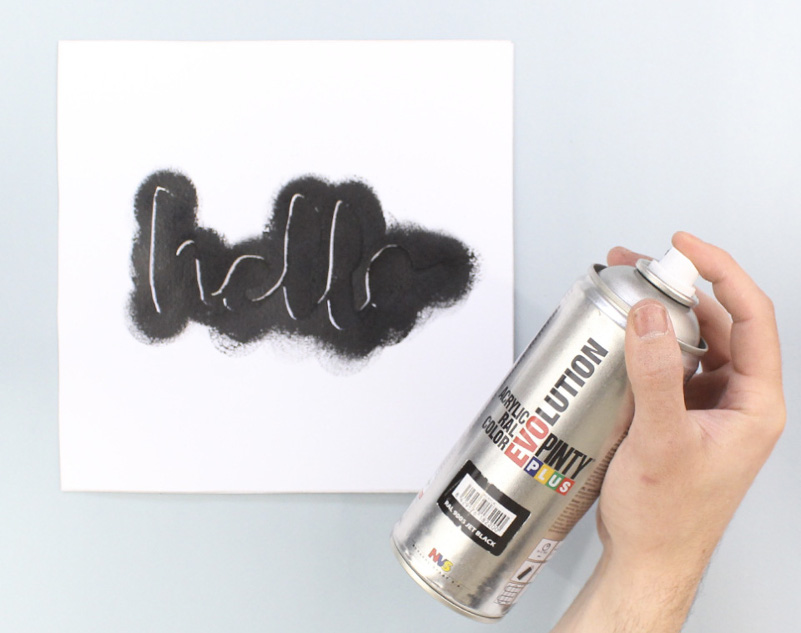
Step 6: decorate the screen:
Once the rice paper has been cut to the size of the open part of the box, it will be decorated with the template we have made. For this, the following steps must be followed:
- Spray the back of the template with removable adhesive spray. To paint on templates or stencils is very important that these are self-adhesive, especially when painted with spray paint. In this way, the paint is prevented from seeping underneath. With our Pintyplus removable adhesive spray, you will achieve the necessary adherence to any template.
- Apply the paint keeping a distance a little higher than usual (about 30/40 cm). In this way, it avoids a lot of paint accumulates on the paper and wrinkles it.
- Remove the template and wait for the paint to dry.
Finally, slide the foil through the inside of the corners that will make the screen of the lightbox.

You only have to turn on or off the light to bring that touch of personalized decoration to your desktop with this DIY lightbox.

What do you think of this DIY project? What is simpler than it seems? If you do not want to miss any of our projects, follow us on Facebook.
Pintypluser: Vincent de ShakeMyBlog